一种在网页中动态渲染美化二维码的前端方案
发布时间:2026-06-22 10:17:28 分类:营销学堂
在网站页面中,有一个典型的场景是在站点里显示一个关注微信公众号的二维码。 为了识别来源渠道,通常我们会使用通过请求微信公众号API,获取一个包含特定场景值的关注公众号二维码,以识别关注用户的访问途径。 除此之外,还有一些场景是我们能获取到的一些已有的二维码图片链接,但是图片的样式是最朴素的二维码样式,可能在一个设计精美的网页上,显得格格不入。
此时,我们可以通过纯前端的方式,读取二维码的内容,然后使用纯前端的方式重新渲染的美观一点的二维码,然后在网页上进行展示。
美观的秘诀
为了让带有Logo的二维码显示更加美观,通常两点需要注意
-
使用更加美观且适合网站风格的码点/码眼样式
-
需要更加优雅的Logo覆盖方式
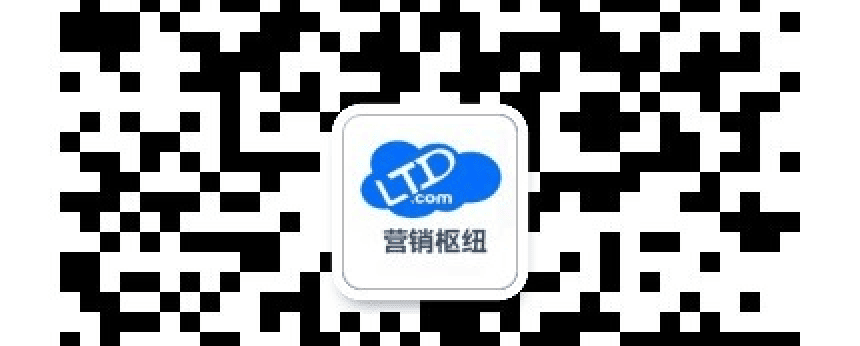
以默认的微信公众号二维码(带Logo)为例,后台生成的二维码,使用了最普通的二维码码点样式(黑色方块),Logo也是放在一个白色卡片上直接覆盖在二维码上面。

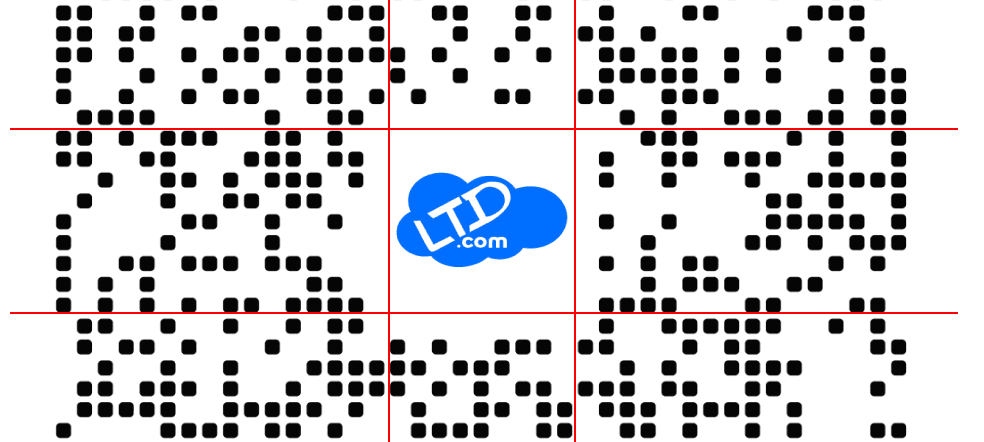
经过样式更换和Logo重新布局后,我们希望可以得到类似这样的二维码

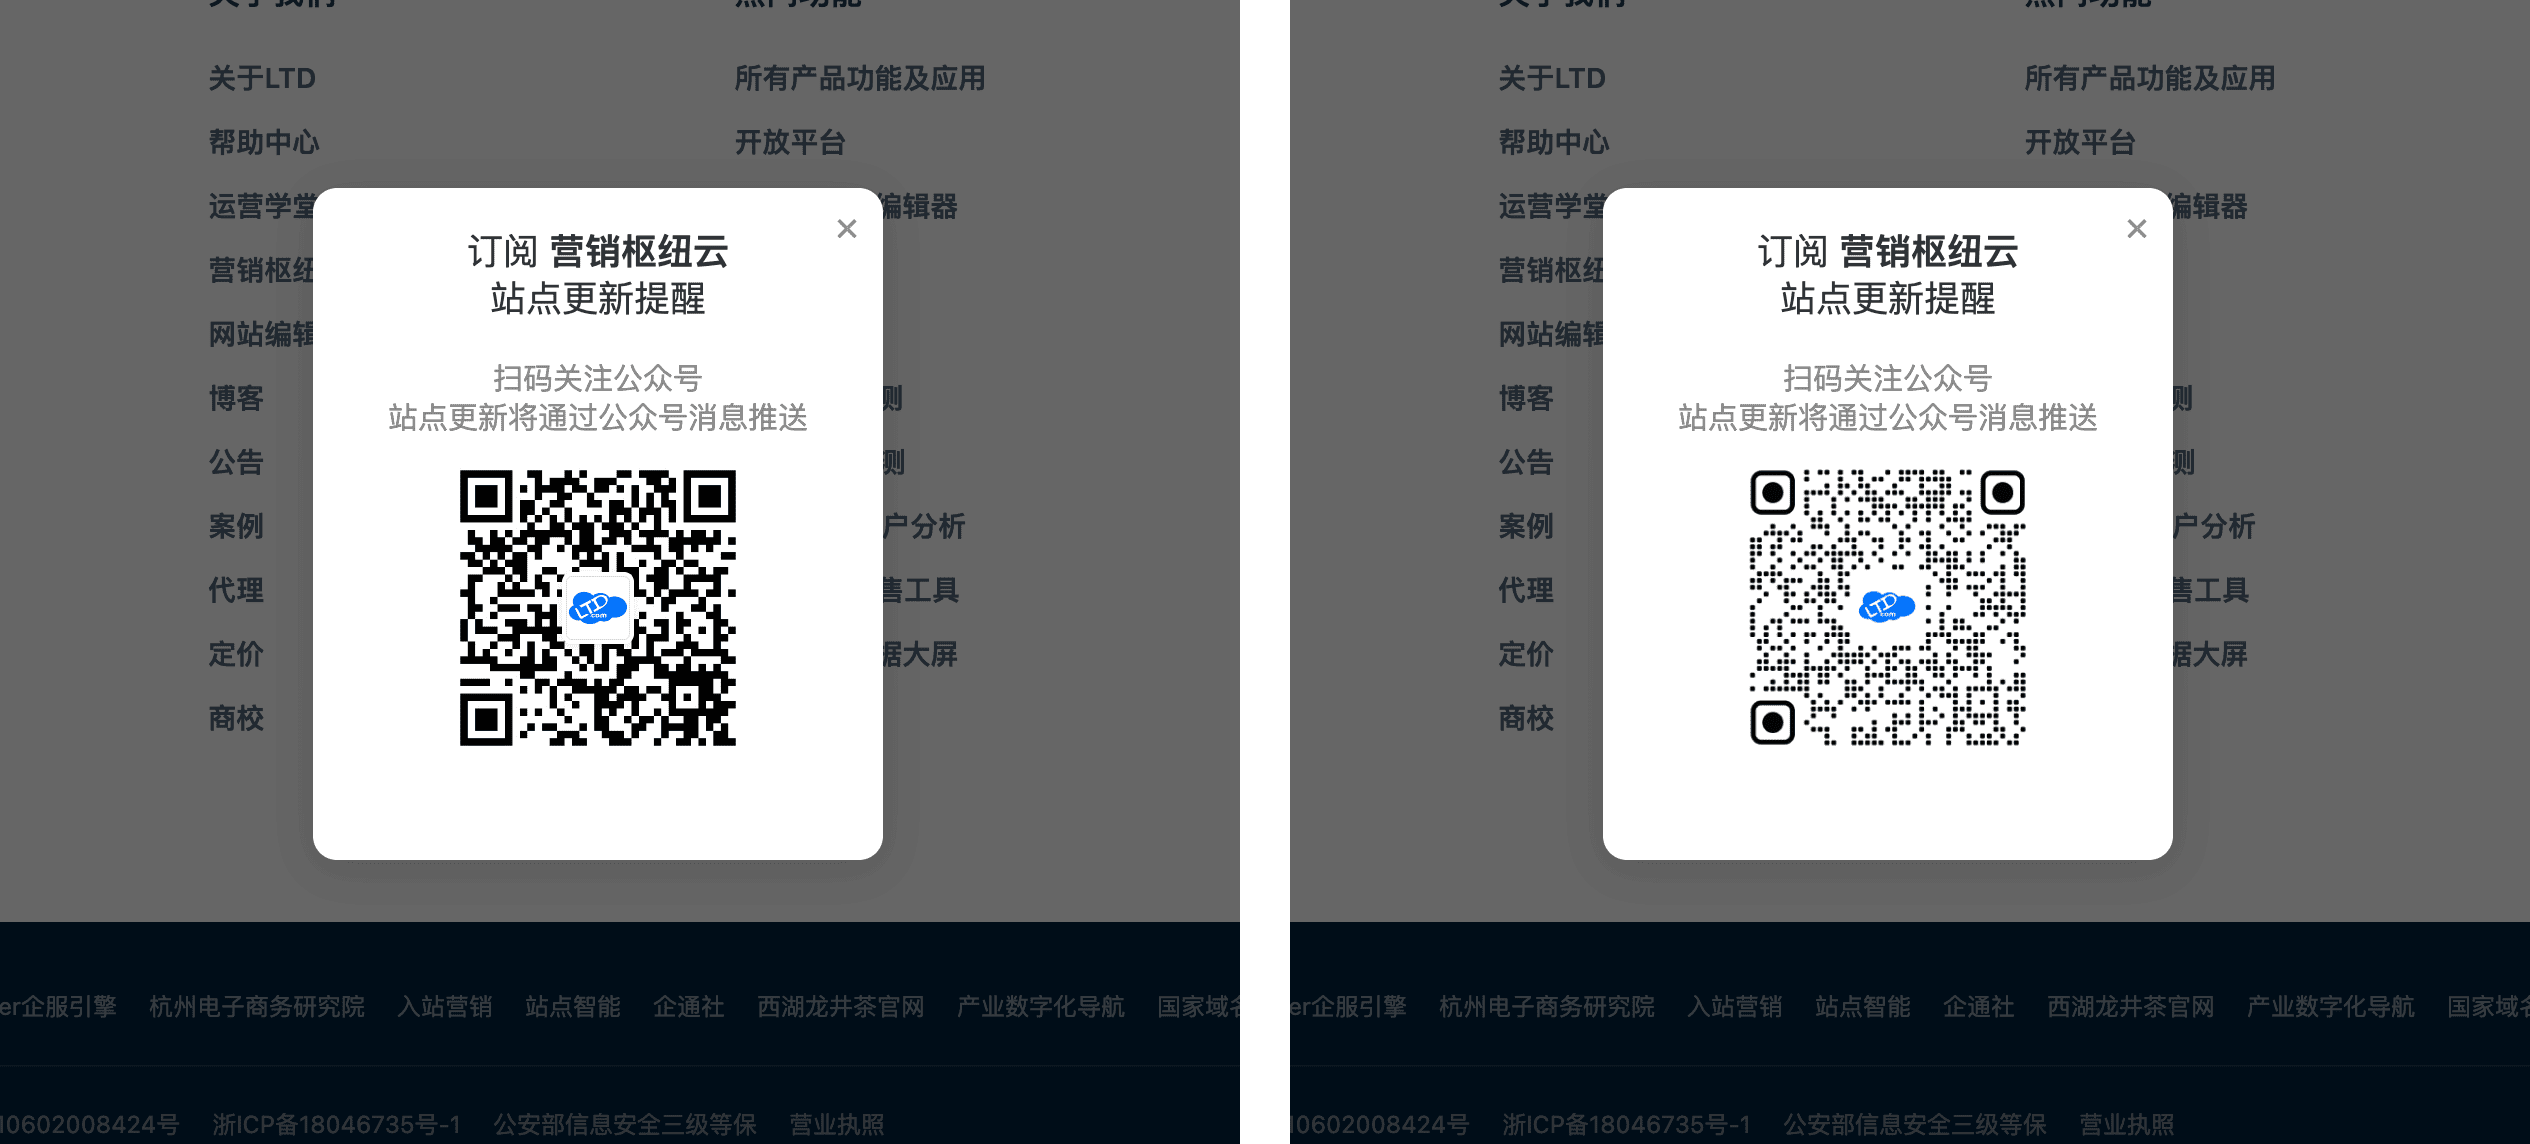
效果对比
比如在下面的场景中,我们可以将微信返回的难看二维码,在前端就能美化为码点和码点是圆角矩形,Logo也重新对齐的二维码。

实现流程
以一些常见的二维码相关JS库为例。
二维码图片 URL
  -> fetch 下载图片
  -> Canvas 读取像素
  -> jsQR 解码出二维码内容
  -> qrcode-generator 重新生成矩阵
  -> SVG 重绘圆角或竖条纹二维码
  -> Canvas 导出 PNG
部分情况下如果二维码图片链接如果不允许跨域读取,浏览器不能从 Canvas 取像素。这种情况通过服务端转发一下图片就行,前端仍然按同样逻辑处理。
直接挂载一个 JS 函数
实际使用时,可以把核心逻辑包成一个函数,挂到 window 上。页面只需要传入二维码图片链接,就能拿到识别出的内容、重绘后的 SVG 和导出的 PNG。
1
2
3
4
5
6
7
8
9
10
11
12
13
14
15
16
17
18
19
20
21
22
23
import jsQR from "https://esm.sh/jsqr@1.4.0";
import qrcode from "https://esm.sh/qrcode-generator@1.4.4";

async function beautifyQrImageUrl(imageUrl, options = {}) {
  const {
    size = 1024,
    style = "rounded",
    download = false
  } = options;

  const decoded = await decodeQrRemoteImage(imageUrl);
  const { matrix } = encodeQrMatrix(decoded.data);
  const svg = renderStyledQrSvg(matrix, { style });
  const pngBlob = await svgToPngBlob(svg, size);

  if (download) {
    downloadBlob(pngBlob, "styled-qr.png");
  }

  return { content: decoded.data, svg, pngBlob };
}

window.beautifyQrImageUrl = beautifyQrImageUrl;
这里省掉了边界处理,真正关键的是三步:读图、解码、重绘。
第一步,用 fetch 把图片链接转成浏览器可加载的 Object URL。
1
2
3
4
5
6
7
8
9
10
11
async function decodeQrRemoteImage(url) {
  const response = await fetch(url, { mode: "cors" });
  const blob = await response.blob();
  const objectUrl = URL.createObjectURL(blob);

  try {
    return await decodeQrImageUrl(objectUrl);
  } finally {
    URL.revokeObjectURL(objectUrl);
  }
}
第二步,把图片画到 Canvas,再交给 jsQR 识别二维码内容。
1
2
3
4
5
6
7
8
9
10
11
12
13
14
15
16
17
18
async function decodeQrImageUrl(url) {
  const image = await loadImage(url);

  const canvas = document.createElement("canvas");
  canvas.width = image.naturalWidth || image.width;
  canvas.height = image.naturalHeight || image.height;

  const ctx = canvas.getContext("2d", { willReadFrequently: true });
  ctx.drawImage(image, 0, 0, canvas.width, canvas.height);

  const imageData = ctx.getImageData(0, 0, canvas.width, canvas.height);
  const code = jsQR(imageData.data, imageData.width, imageData.height, {
    inversionAttempts: "attemptBoth"
  });

  if (!code) throw new Error("没有识别到二维码内容");
  return { data: code.data };
}
第三步,重新生成二维码矩阵。这里用 H 容错率,这样可以为Logo留出更多可操作空间。
1
2
3
4
5
6
7
8
9
10
11
12
function encodeQrMatrix(text) {
  const qr = qrcode(0, "H");
  qr.addData(text.trim());
  qr.make();

  const moduleCount = qr.getModuleCount();
  const matrix = Array.from({ length: moduleCount }, (_, row) =>
    Array.from({ length: moduleCount }, (_, col) => qr.isDark(row, col))
  );

  return { matrix, size: moduleCount };
}
最后按样式重绘。示例中我们使用码点样式:rounded 。
1
2
3
4
5
6
7
8
9
10
11
12
13
14
15
16
17
18
19
20
21
22
23
24
25
26
27
28
29
30
31
32
33
34
35
36
37
38
39
40
41
42
43
44
45
46
47
48
49
50
51
52
53
54
55
56
57
58
59
60
61
function renderStyledQrSvg(matrix, options) {
  const { style } = options;
  const quiet = 4;
  const dark = "#050505";
  const background = "#ffffff";
  const size = matrix.length;
  const viewBoxSize = size + quiet * 2;
  const dotPainter = getDotPainter(style);

  const dots = matrix.flatMap((row, rowIndex) =>
    row.map((isDark, colIndex) => {
      if (!isDark || isFinderModule(rowIndex, colIndex, size)) {
        return "";
      }

      return dotPainter(rowIndex, colIndex, quiet, dark);
    })
  );

  return `
    <svg xmlns="http://www.w3.org/2000/svg" viewBox="0 0 ${viewBoxSize} ${viewBoxSize}">
      <rect width="${viewBoxSize}" height="${viewBoxSize}" fill="${background}" />
      ${dots.join("")}
      ${drawRoundedFinder(quiet, quiet, dark, background)}
      ${drawRoundedFinder(size - 7 + quiet, quiet, dark, background)}
      ${drawRoundedFinder(quiet, size - 7 + quiet, dark, background)}
    </svg>
  `;
}

function getDotPainter(style) {
  return style === "vertical" ? drawVerticalDot : drawRoundedDot;
}

function drawRoundedDot(row, col, quiet, color) {
  const x = col + quiet;
  const y = row + quiet;

  return `<rect
    x="${x + 0.14}"
    y="${y + 0.14}"
    width="0.72"
    height="0.72"
    rx="0.2"
    fill="${color}"
  />`;
}

function drawVerticalDot(row, col, quiet, color) {
  const x = col + quiet;
  const y = row + quiet;

  return `<rect
    x="${x + 0.25}"
    y="${y + 0.08}"
    width="0.5"
    height="0.84"
    rx="0.25"
    fill="${color}"
  />`;
}
logo 区域要对齐二维码网格的方式:
不要拿一个任意像素尺寸的 logo 直接盖在中间。更好的做法是,先按二维码的模块数算出一个居中的窗口,重绘码点时跳过这个窗口,再把 logo 放进同一组模块坐标里。这样 logo 边缘不会切到半个码点。
1
2
3
4
5
6
7
8
9
10
11
12
13
14
15
16
17
18
19
20
function computeLogoWindow(matrixSize, scale = 0.22) {
  const rawSize = Math.max(5, Math.round(matrixSize * scale));
  const size = rawSize % 2 === 0 ? rawSize + 1 : rawSize;
  const start = Math.floor((matrixSize - size) / 2);

  return {
    start,
    end: start + size,
    size
  };
}

function isInsideLogoWindow(row, col, logoWindow) {
  return (
    row >= logoWindow.start &&
    row < logoWindow.end &&
    col >= logoWindow.start &&
    col < logoWindow.end
  );
}
重绘时跳过 logo 窗口:
if (isInsideLogoWindow(rowIndex, colIndex, logoWindow)) {
  return "";
}
再用同样的模块坐标放 logo:
1
2
3
4
5
6
7
8
9
10
11
12
13
14
15
16
17
18
19
20
21
const logoX = logoWindow.start + quiet;
const logoY = logoWindow.start + quiet;

const logoMarkup = `
  <rect
    x="${logoX}"
    y="${logoY}"
    width="${logoWindow.size}"
    height="${logoWindow.size}"
    rx="1.35"
    fill="#ffffff"
  />
  <image
    href="${logoUrl}"
    x="${logoX + 1}"
    y="${logoY + 1}"
    width="${logoWindow.size - 2}"
    height="${logoWindow.size - 2}"
    preserveAspectRatio="xMidYMid meet"
  />
`;
这个技巧原则上就是一句话:用 JS 先读出原二维码的内容,再重新画一张符合我们要求的新的二维码图片,然后展示出来。